

So, you’ve decided to embark on a bikepacking adventure. Congratulations! You’re about to trade Netflix marathons for actual marathons, couch cushions for rocks disguised as pillows, and Wi-Fi signals for the haunting cry of a distant owl that’s probably judging your life choices. But fear not! This guide will turn you from a “I-bought-a-bike-lock-once” amateur into a “I-can-fix-a-flat-tire-with-gum-and-a-dream” legend. Let’s get you ready for the ride of your life.
Step 1: Embrace the Chaos (aka Mental Preparation)
Bikepacking is equal parts endurance sport and therapy session. You’ll question your life choices, argue with your bike seat, and possibly weep over a Snickers bar. Here’s how to mentally prep:
A. Accept That You’re Not Chris Froome
Unless you’re secretly a Tour de France rider moonlighting as a Reddit user, you’re not climbing the Alps in 30 minutes. Start small. Your ego might want to tackle the entire Continental Divide Trail, but your thighs will mutiny. Build up to big rides with weekend trips. Think of it like dating: don’t propose on the first ride.
B. Befriend Discomfort
You will be cold, wet, sore, and/or sunburned. Lean into it. Imagine you’re a Viking warrior, except your longship is a bicycle and your enemies are hills. Pro tip: Name your bike something fierce, like Thunder Thighs or The Saddle Slayer, to boost morale.
C. Practice Positive Delusions
When the going gets tough, repeat mantras like:
- “This is fun! My legs are having fun!”
- “That’s not chafing; it’s just my skin applauding my effort.”
- “I paid money for this. I’m basically on vacation.”
Step 2: Gear Up Without Selling a Kidney
Bikepacking gear is a rabbit hole deeper than your ex’s Instagram. But you don’t need titanium everything. Here’s the low-budget, high-reward cheat sheet:
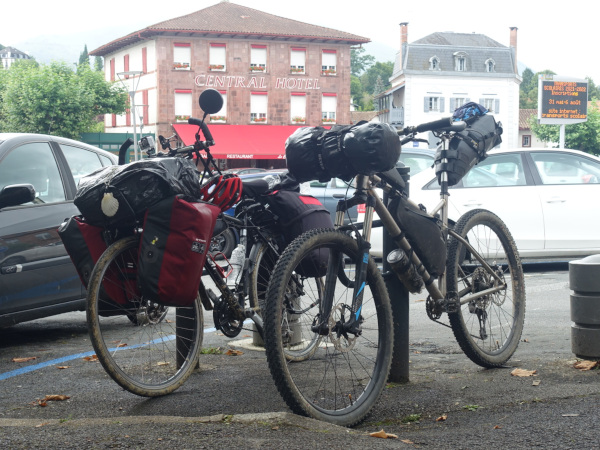
A. The Bike
Your trusty steed doesn’t need to cost $5,000 (unless you enjoy eating ramen for a year). A sturdy mountain bike, gravel bike, or even a Frankenstein’d hybrid will work. Key upgrades:
- Tires: Fat enough to handle gravel, mud, and existential dread.
- Gears: Low ones. You’re not too cool for granny gears.
- Comfy Seat: Your butt will thank you. Or sue you.
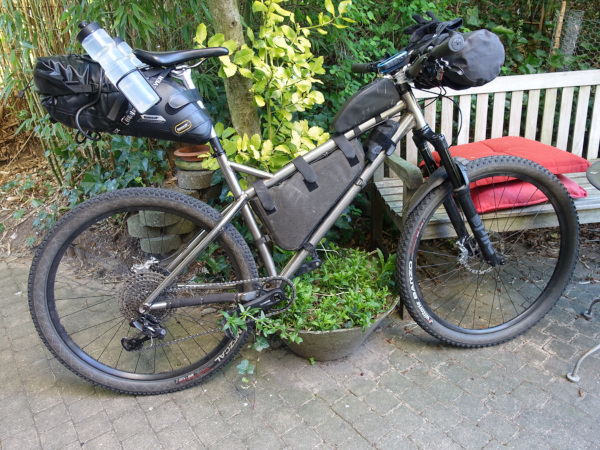
B. Bags, Bags, Bags (But Make It Fashion)
Bikepacking bags turn your bike into a pack mule. Essentials:
- Frame Bag: For snacks, tools, and that 11th Clif Bar you swear you’ll eat “later.”
- Handlebar Roll: Holds your tent, sleeping bag, and dignity.
- Saddle Bag: For clothes and things you’ll forget exist until Day 3.
- Top Tube Bag: Quick-access for phone, snacks, and emergency glitter (for morale).
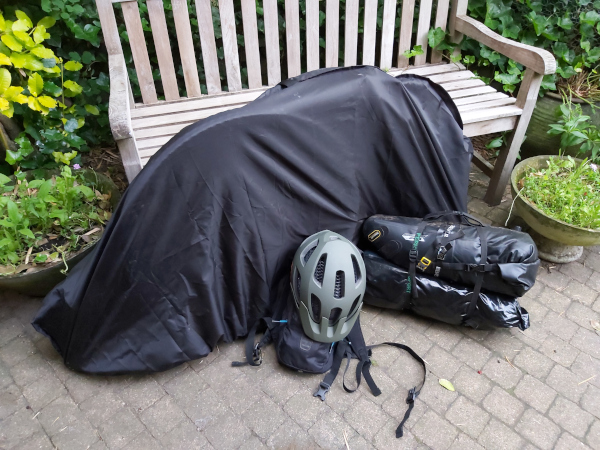
C. Shelter: Your Portable Fortress of Solitude
A lightweight tent, hammock, or bivy sack will do. Pro tip: Practice setting it up at home. Otherwise, you’ll be that person sobbing under a tarp at 2 a.m. while squirrels heckle you.
D. Sleep System
- Sleeping Bag: Rated for the coldest temps you’ll face (add 10°F for “I’m optimistic” realism).
- Sleeping Pad: Inflatable or foam. Choose based on whether you value comfort or not hating yourself after a puncture.
E. Clothing: Dress Like an Onion
Layers are your BFF. Pack:
- Base Layers: Merino wool = magic. It wicks sweat, results in smells, and doubles as a conversation starter.
- Rain Gear: Because hypothermia isn’t quirky.
- Bike Shorts: Padded. Always padded. Chamois cream is your friend. Your butt’s friend.
F. Tools & Fix-Its
- Multi-Tool: For tightening bolts and pretending you know what you’re doing.
- Spare Tube + Patch Kit: Flat tires are inevitable, like taxes or that one friend who says “I told you so.”
- Duct Tape: Fixes bikes, blisters, and broken dreams.
- Chain Lube: A dry chain sounds like a dying robot. Don’t be that guy.
G. Food: Fuel for the Dark Times
Calories = joy. Pack:
- Trail Mix: The M&Ms-to-nuts ratio should be 80/20. This is science.
- Instant Coffee: You’re not a monster.
- Freeze-Dried Meals: Astronaut food for people who’ll Instagram their “rustic” dinner.
- Whiskey: For medicinal purposes (i.e., forgetting you’re sleeping on a rock).
Step 3: Plan Your Route (Or How to Avoid Getting Eaten by Bears)
A. Pick a Route That Doesn’t Hate You
Use apps like Komoot, Gaia GPS, or “Ask That Guy at the Bike Shop.” Consider:
- Distance: 30 miles/day is a good start unless you’re part mountain goat.
- Terrain: Dirt roads > technical singletrack (unless you enjoy walking your bike uphill).
- Resupply Points: Know where to find water, food, and that gas station nacho cheese that’s weirdly delicious.
B. Navigation: Don’t Trust Your Gut
- GPS Device: Fancy ones can map your route, track your tears, and call for help.
- Paper Maps: Romantic and flammable. Use as backup.
- Local Intel: Talk to other riders. Phrases to use: “Any murderous goats on Trail 42?” or “Where’s the secret waterfall?”
C. Safety: Don’t Die, Please
- Tell Someone Your Plan: “If I’m not back by Tuesday, I’m either dead or finally happy.”
- First Aid Kit: Bandages, painkillers, and tweezers for removing regrets (or splinters).
- Bear Spray: Optional unless you’re in bear country, in which case it’s a $50 airhorn for your confidence.
Step 4: Train Like You Mean It (But Mostly Just Ride Your Bike)
A. Build Endurance Slowly
Start with short rides, then add distance. Think of it like binge-watching a series: one episode at a time until you’re a shell of a human.
B. Practice Loaded Rides
Ride with all your gear. Discover that your bike handles like a drunk elephant. Adjust accordingly.
C. Climb Hills. Cry. Repeat.
Hills are nature’s way of saying, “You sure about this?” Train on inclines until your legs mutter, “Fine, we’ll do it.”
D. Dial In Your Bike Fit
A bad fit = back pain, numb hands, and a hatred of all things beautiful. Visit a bike shop or YouTube until you’re 80% sure you’re doing it right.
Step 5: Master the Art of Not Hating Yourself
A. Pack Light(ish)
Every gram counts. Ask: “Will this spark joy?” If not, throw it at Marie Kondo. Essentials only:
- 1 set of riding clothes, 1 set of camp clothes
- Toothbrush (snip the handle to save weight)
- A book you’ll never read
B. Learn Basic Repairs
YouTube tutorials to master:
- Fixing a flat
- Adjusting brakes
- Silently judging someone who uses WD-40 as chain lube
C. Test Everything
Camp in your backyard. Cook your freeze-dried chili. Realize you forgot a spoon and eat it with your hands like the feral goblin you’ve become.
Step 6: Survive the First 24 Hours (A Play-by-Play)
Day 1:
- 6:00 a.m.: Wake up buzzing with excitement. Eat oatmeal like it’s your last meal.
- 8:00 a.m.: Start riding. Feel invincible.
- 10:00 a.m.: First hill. Question existence.
- 12:00 p.m.: Eat lunch. Declare it “the best sandwich ever.”
- 3:00 p.m.: Realize you’ve been singing “Baby Shark” for 20 miles.
- 6:00 p.m.: Set up camp. Struggle with tent poles. Swear.
- 8:00 p.m.: Eat chili. Stare at the stars. Feel like a tiny, badass speck in the universe.
Step 7: Embrace the Suck (Advanced Level)
- Rain: You’re waterproof(ish). Dance in it.
- Bugs: They’re just protein with wings.
- Getting Lost: Call it an “unplanned adventure.”
- Bodily Functions: Embrace backcountry bathrooms (a.k.a. trees).
Step 8: Come Home a Hero (or at Least Smell Like One)
- Reflect: Journal, blog, or lie to your friends about how “easy” it was.
- Clean Your Gear: Remove dirt, leaves, and the soul-crushing weight of societal expectations.
- Plan the Next Trip: Because now you’re hooked.
Final Pro Tips:
- Laugh at yourself often.
- High-five trees (they’re great listeners).
- Remember: The worst day bikepacking beats the best day in a cubicle.
Now go forth, pedal hard, and may the wind be ever at your back (or at least not in your face).